- Chapters
- 263
- Arcs
- 9
- Volumes
- 30
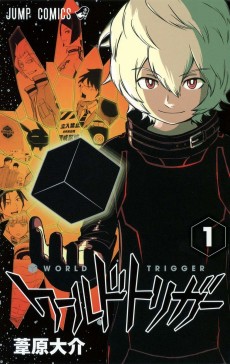
A gate to another dimension has burst open, and from it emerge gigantic invincible creatures that threaten all of humanity. Earth's only defense is a mysterious group of warriors who have co-opted the alien technology in order to fight back! (Source: VIZ Media)
Log in or create an account to confirm or dispute what is recorded here. Every vote moves the record's confidence and is kept in its history.
Arc Atlas
Every arc, volume and season of this story, side by side on one chapter ruler.
Hover for a name · click an arc to jump to it
Edit arcsWorld Trigger (manga)
9 arcs · 263 chapters · 30 volumes
Use this story in your app (API)
Every call needs a free key from your
API keys
page, sent as Authorization: Bearer fdx_…. Replace fdx_YOUR_KEY
below. Responses are JSON; every record carries
its confidence.
Everything about the story
https://fabledex.com/api/v1/stories/world-trigger
Story record and editions
https://fabledex.com/api/v1/stories/world-trigger/info
Editions and their catalogue ids
https://fabledex.com/api/v1/stories/world-trigger/editions
Arcs of the manga, in chapters
https://fabledex.com/api/v1/stories/world-trigger/arcs?edition=manga
Which arc chapter 7 of the manga is in
https://fabledex.com/api/v1/stories/world-trigger/arcs/at/7?edition=manga
Only the long storylines (major arcs); ?level=sub for only the short ones
https://fabledex.com/api/v1/stories/world-trigger/arcs?edition=manga&level=major
Chapters of the manga
https://fabledex.com/api/v1/stories/world-trigger/units?edition=manga
Volumes or seasons of the manga (the publisher's split)
https://fabledex.com/api/v1/stories/world-trigger/sections?edition=manga
Same arcs, addressed by its MyAnimeList id
https://fabledex.com/api/v1/stories/mal:48151/arcs
Arcs
Confirm or dispute the arc and each range separately, so a wrong chapter range can be disputed without disputing the arc. Editing is one form: name, description and range together.
-
1 Fateful Encounter Arc
Yuma Kuga transfers to Osamu Mikumo's school and reveals that he is a Neighbor, introducing Mikumo and the world of Border and its agents.
-
manga
chapters 1–16
-
manga
chapters 1–16
-
2 Black Trigger Capture Arc
Border learns of Yuma's Neighbor identity and sends its top squads after his Black Trigger, while Tamakoma Branch moves to protect him.
-
manga
chapters 17–32
-
manga
chapters 17–32
-
3 Border Enlistment Arc
On Border's official enlistment day Yuma and Chika debut as agents, clashes follow, and Border is called to prepare for an upcoming invasion.
-
manga
chapters 33–43
-
manga
chapters 33–43
-
4 Large-Scale Invasion Arc
Humanoid Neighbors from Aftokrator invade Mikado City, and Border fights to protect civilians and C-rank trainees.
-
manga
chapters 44–85
-
manga
chapters 44–85
-
5 B-Rank Wars Arc
Yuma and Chika become B-rank agents and form Tamakoma Second with Osamu as captain, joining the Rank Wars to qualify for the away team.
-
manga
chapters 86–120
-
manga
chapters 86–120
-
6 Galopoula's Invasion Arc
As the Rank Wars continue, Border's A-rank and free B-rank squads thwart an expedition from Galopoula and Rhodokhroun against Border's expedition ship.
-
manga
chapters 121–136
-
manga
chapters 121–136
-
7 B-Rank Wars Arc (Part 2)
Tamakoma Second keeps fighting through the Rank Wars to finish among the top two B-rank teams and earn a place on the away team.
-
manga
chapters 137–199
-
manga
chapters 137–199
-
8 Away Mission Test Arc, Phase 1
Border's away team candidates are put through a long selection test, beginning with a short run of transition chapters.
-
manga
chapters 200–257
-
manga
chapters 200–257
-
9 Away Mission Test Arc, Phase 2
The second phase of the away mission selection test begins (still being serialized).
-
manga
chapters 258–263
· ongoing
-
manga
chapters 258–263
· ongoing
World Trigger (manga): chapters
| # | Title | Vol. | Released | Trust |
|---|---|---|---|---|
| 1 | Osamu Mikumo |
|
||
| 2 | Yūma Kuga |
|
||
| 3 | Yūma Kuga: Part 2 |
|
||
| 4 | Osamu Mikumo: Part 2 |
|
||
| 5 | Yūma Kuga: Part 3 |
|
||
| 6 | Arashiyama Squad |
|
||
| 7 | Ai Kitora |
|
||
| 8 | Ai Kitora: Part 2 |
|
||
| 9 | Ai Kitora: Part 3 |
|
||
| 10 | Border's Upper Echelons |
|
||
| 11 | Yūichi Jin |
|
||
| 12 | Chika Amatori |
|
||
| 13 | Chika Amatori: Part 2 |
|
||
| 14 | Miwa Squad |
|
||
| 15 | Miwa Squad: Part 2 |
|
||
| 16 | Miwa Squad: Part 3 |
|
||
| 17 | Yūichi Jin: Part 2 |
|
||
| 18 | Yūgo Kuga |
|
||
| 19 | Tamakoma Branch |
|
||
| 20 | Yūma Kuga: Part 4 |
|
||
| 21 | Osamu Mikumo: Part 3 |
|
||
| 22 | Tamakoma Branch: Part 2 |
|
||
| 23 | Tamakoma Branch: Part 3 |
|
||
| 24 | HQ's Top Teams |
|
||
| 25 | Yūichi Jin: Part 3 |
|
||
| 26 | Arashiyama Squad: Part 2 |
|
||
| 27 | Kei Tachikawa |
|
||
| 28 | Yūichi Jin: Part 4 |
|
||
| 29 | Arashiyama Squad: Part 3 |
|
||
| 30 | Arashiyama Squad: Part 4 |
|
||
| 31 | Yūichi Jin: Part 5 |
|
||
| 32 | Yūichi Jin: Part 6 |
|
||
| 33 | Yūma Kuga: Part 5 |
|
||
| 34 | Chika Amatori: Part 3 |
|
||
| 35 | Osamu Mikumo: Part 4 |
|
||
| 36 | Osamu Mikumo: Part 5 |
|
||
| 37 | Osamu Mikumo: Part 6 |
|
||
| 38 | Yūma Kuga: Part 6 |
|
||
| 39 | Yūma Kuga: Part 7 |
|
||
| 40 | Yūma Kuga: Part 8 |
|
||
| 41 | Replica |
|
||
| 42 | Replica: Part 2 |
|
||
| 43 | Yūichi Jin: Part 7 |
|
||
| 44 | Large-Scale Invasion |
|
||
| 45 | Large-Scale Invasion: Part 2 |
|
||
| 46 | Large-Scale Invasion: Part 3 |
|
||
| 47 | Large-Scale Invasion: Part 4 |
|
||
| 48 | Large-Scale Invasion: Part 5 |
|
||
| 49 | Large-Scale Invasion: Part 6 |
|
||
| 50 | Osamu Mikumo: Part 7 |
|
||
| 51 | Ai Kitora: Part 4 |
|
||
| 52 | Chika Amatori: Part 4 |
|
||
| 53 | Tamakoma First |
|
||
| 54 | Aftokrator |
|
||
| 55 | Tamakoma First: Part 2 |
|
||
| 56 | Kazama Squad |
|
||
| 57 | Large-Scale Invasion: Part 7 |
|
||
| 58 | Large-Scale Invasion: Part 8 |
|
||
| 59 | Large-Scale Invasion: Part 9 |
|
||
| 60 | Large-Scale Invasion: Part 10 |
|
||
| 61 | Large-Scale Invasion: Part 11 |
|
||
| 62 | Aftokrator: Part 2 |
|
||
| 63 | Large-Scale Invasion: Part 12 |
|
||
| 64 | Large-Scale Invasion: Part 13 |
|
||
| 65 | Large-Scale Invasion: Part 14 |
|
||
| 66 | Large-Scale Invasion: Part 15 |
|
||
| 67 | Large-Scale Invasion: Part 16 |
|
||
| 68 | Aftokrator: Part 3 |
|
||
| 69 | Osamu Mikumo: Part 8 |
|
||
| 70 | Large-Scale Invasion: Part 17 |
|
||
| 71 | Large-Scale Invasion: Part 18 |
|
||
| 72 | Large-Scale Invasion: Part 19 |
|
||
| 73 | Large-Scale Invasion: Part 20 |
|
||
| 74 | Kyōsuke Karasuma |
|
||
| 75 | Large-Scale Invasion: Part 21 |
|
||
| 76 | Shūji Miwa |
|
||
| 77 | Large-Scale Invasion: Part 22 |
|
||
| 78 | Yūma Kuga: Part 9 |
|
||
| 79 | Large-Scale Invasion: Part 23 |
|
||
| 80 | Replica: Part 3 |
|
||
| 81 | Large-Scale Invasion: Part 24 |
|
||
| 82 | Osamu Mikumo: Part 9 |
|
||
| 83 | Yūma Kuga: Part 10 |
|
||
| 84 | Osamu Mikumo: Part 10 |
|
||
| 85 | Osamu Mikumo: Part 11 |
|
||
| 86 | Tamakoma Second |
|
||
| 87 | Tamakoma Second: Part 2 |
|
||
| 88 | Tamakoma Second: Part 3 |
|
||
| 89 | Tamakoma Second: Part 4 |
|
||
| 90 | Tamakoma Second: Part 5 |
|
||
| 91 | Tamakoma Second: Part 6 |
|
||
| 92 | Shiori Usami |
|
||
| 93 | Kō Murakami |
|
||
| 94 | Yūma Kuga: Part 11 |
|
||
| 95 | Suzunari First |
|
||
| 96 | Nasu Squad |
|
||
| 97 | Nasu Squad: Part 2 |
|
||
| 98 | Nasu Squad: Part 3 |
|
||
| 99 | Nasu Squad: Part 4 |
|
||
| 100 | Kō Murakami: Part 2 |
|
||
| 101 | Yūma Kuga: Part 12 |
|
||
| 102 | Rei Nasu |
|
||
| 103 | Tamakoma Second: Part 7 |
|
||
| 104 | Tamakoma Branch: Part 7 |
|
||
| 105 | Aftokrator: Part 4 |
|
||
| 106 | Masataka Ninomiya |
|
||
| 107 | Osamu Mikumo: Part 12 |
|
||
| 108 | Yuzuru Ema |
|
||
| 109 | Masato Kageura |
|
||
| 110 | Haruaki Azuma |
|
||
| 111 | Yūichi Jin: Part 8 |
|
||
| 112 | Haruaki Azuma: Part 2 |
|
||
| 113 | Kageura Squad |
|
||
| 114 | Masataka Ninomiya: Part 2 |
|
||
| 115 | Osamu Mikumo: Part 13 |
|
||
| 116 | Yūichi Jin: Part 9 |
|
||
| 117 | Yōtarō Rindō |
|
||
| 118 | Chika Amatori: Part 5 |
|
||
| 119 | Aftokrator: Part 5 |
|
||
| 120 | Aftokrator: Part 6 |
|
||
| 121 | Galopoula |
|
||
| 122 | Ai Kitora: Part 5 |
|
||
| 123 | Galopoula: Part 2 |
|
||
| 124 | Galopoula: Part 3 |
|
||
| 125 | Galopoula: Part 4 |
|
||
| 126 | Galopoula: Part 5 |
|
||
| 127 | Galopoula: Part 6 |
|
||
| 128 | Galopoula: Part 7 |
|
||
| 129 | Galopoula: Part 8 |
|
||
| 130 | Galopoula: Part 9 |
|
||
| 131 | Galopoula: Part 10 |
|
||
| 132 | Galopoula: Part 11 |
|
||
| 133 | Galopoula: Part 12 |
|
||
| 134 | Yōtarō Rindō: Part 2 |
|
||
| 135 | Hyuse |
|
||
| 136 | Galopoula: Part 13 |
|
||
| 137 | Katori Squad |
|
||
| 138 | Tamakoma Second: Part 9 |
|
||
| 139 | Tamakoma Second: Part 10 |
|
||
| 140 | Tamakoma Second: Part 11 |
|
||
| 141 | Tamakoma Second: Part 12 |
|
||
| 142 | Kuniharu Kakizaki |
|
||
| 143 | Osamu Mikumo: Part 14 |
|
||
| 144 | Yōko Katori |
|
||
| 145 | Tamakoma Second: Part 13 |
|
||
| 146 | Tamakoma Second: Part 14 |
|
||
| 147 | Hyuse: Part 2 |
|
||
| 148 | Osamu Mikumo: Part 15 |
|
||
| 149 | Chika Amatori: Part 6 |
|
||
| 150 | Tamakoma Second: Part 15 |
|
||
| 151 | Tamakoma Second: Part 16 |
|
||
| 152 | Tamakoma Second: Part 17 |
|
||
| 153 | Tatsuhito Ikoma |
|
||
| 154 | Tatsuhito Ikoma: Part 2 |
|
||
| 155 | Ōji Squad |
|
||
| 156 | Kazuaki Ōji |
|
||
| 157 | Tamakoma Second: Part 18 |
|
||
| 158 | Tamakoma Second: Part 19 |
|
||
| 159 | Hyuse: Part 3 |
|
||
| 160 | Hyuse: Part 4 |
|
||
| 161 | Tamakoma Branch: Part 4 |
|
||
| 162 | Tamakoma Branch: Part 5 |
|
||
| 163 | Yuzuru Ema: Part 2 |
|
||
| 164 | Tamakoma Second: Part 20 |
|
||
| 165 | Osamu Mikumo: Part 16 |
|
||
| 166 | Tamakoma-2: Part 21 |
|
||
| 167 | Suzunari-1: Part 2 |
|
||
| 168 | Suzunari-1: Part 3 |
|
||
| 169 | Tamakoma-2: Part 22 |
|
||
| 170 | Tamakoma-2: Part 23 |
|
||
| 171 | Hyuse: Part 5 |
|
||
| 172 | Hyuse: Part 6 |
|
||
| 173 | Azuma Squad |
|
||
| 174 | Azuma Squad: Part 2 |
|
||
| 175 | Hyuse: Part 7 |
|
||
| 176 | Eizo Netsuki |
|
||
| 177 | Osamu Mikumo: Part 17 |
|
||
| 178 | Ninomiya Squad |
|
||
| 179 | Chika Amatori: Part 7 |
|
||
| 180 | Kazuma Satomi |
|
||
| 181 | Takuma Yuba |
|
||
| 182 | Tamakoma Branch: Part 6 |
|
||
| 183 | Tamakoma Branch: Part 7 |
|
||
| 184 | Yuba Squad |
|
||
| 185 | Ninomiya Squad: Part 2 |
|
||
| 186 | Hyuse: Part 8 |
|
||
| 187 | Yuba Squad: Part 2 |
|
||
| 188 | Hyuse: Part 9 |
|
||
| 189 | Chika Amatori: Part 8 |
|
||
| 190 | Yuba Squad: Part 3 |
|
||
| 191 | Yuba Squad: Part 4 |
|
||
| 192 | Masataka Ninomiya: Part 3 |
|
||
| 193 | Masataka Ninomiya: Part 4 |
|
||
| 194 | Osamu Mikumo: Part 18 |
|
||
| 195 | Chika Amatori: Part 9 |
|
||
| 196 | Tamakoma Second: Part 24 |
|
||
| 197 | B-Rank MidTier Final Match |
|
||
| 198 | B-Rank MidTier Final Match: Part 2 |
|
||
| 199 | B-Rank War's End |
|
||
| 200 | Ruka Shinoda |
|
||
| 201 | Yōtarō Rindō: Part 3 |
|
||
| 202 | Galopoula: Part 14 |
|
||
| 203 | The Away Mission Test |
|
||
| 204 | The Away Mission Test: Part 2 |
|
||
| 205 | The Away Mission Test: Part 3 |
|
||
| 206 | The Away Mission Test: Part 4 |
|
||
| 207 | The Away Mission Test: Part 5 |
|
||
| 208 | The Away Mission Test: Part 6 |
|
||
| 209 | The Away Mission Test: Part 7 |
|
||
| 210 | The Away Mission Test: Part 8 |
|
||
| 211 | The Away Mission Test: Part 9 |
|
||
| 212 | The Away Mission Test: Part 10 |
|
||
| 213 | The Away Mission Test: Part 11 |
|
||
| 214 | The Away Mission Test: Part 12 |
|
||
| 215 | The Away Mission Test: Part 13 |
|
||
| 216 | The Away Mission Test: Part 14 |
|
||
| 217 | The Away Mission Test: Part 15 |
|
||
| 218 | The Away Mission Test: Part 16 |
|
||
| 219 | The Away Mission Test: Part 17 |
|
||
| 220 | The Away Mission Test: Part 18 |
|
||
| 221 | The Away Mission Test: Part 19 |
|
||
| 222 | The Away Mission Test: Part 20 |
|
||
| 223 | The Away Mission Test: Part 21 |
|
||
| 224 | The Away Mission Test: Part 22 |
|
||
| 225 | Katori Squad 2 |
|
||
| 226 | The Away Mission Test: Part 23 |
|
||
| 227 | The Away Mission Test: Part 24 |
|
||
| 228 | The Away Mission Test: Part 25 |
|
||
| 229 | The Away Mission Test: Part 26 |
|
||
| 230 | The Away Mission Test: Part 27 |
|
||
| 231 | The Away Mission Test: Part 28 |
|
||
| 232 | The Away Mission Test: Part 29 |
|
||
| 233 | The Away Mission Test: Part 30 |
|
||
| 234 | The Away Mission Test: Part 31 |
|
||
| 235 | The Away Mission Test: Part 32 |
|
||
| 236 | Mirai Hatohara |
|
||
| 237 | The Away Mission Test: Part 33 |
|
||
| 238 | The Away Mission Test: Part 34 |
|
||
| 239 | The Away Mission Test: Part 35 |
|
||
| 240 | The Away Mission Test: Part 36 |
|
||
| 241 | The Away Mission Test: Part 37 |
|
||
| 242 | The Away Mission Test: Part 38 |
|
||
| 243 | The Away Mission Test: Part 39 |
|
||
| 244 | The Away Mission Test: Part 40 |
|
||
| 245 | Rokuro Wakamura |
|
||
| 246 | Rokuro Wakamura: Part 2 |
|
||
| 247 | Rokuro Wakamura: Part 3 |
|
||
| 248 | Rokuro Wakamura: Part 4 |
|
||
| 249 | The Away Mission Test: Part 41 |
|
||
| 250 | The Away Mission Test: Part 42 |
|
||
| 251 | Shiki Sayoko |
|
||
| 252 | The Away Mission Test: Part 43 |
|
||
| 253 | The Away Mission Test: Part 44 |
|
||
| 254 | The Away Mission Test: Part 45 |
|
||
| 255 | The Away Mission Test: Part 46 |
|
||
| 256 | The Away Mission Test: Part 47 |
|
||
| 257 | The Away Mission Test: Part 48 |
|
||
| 258 | The Away Mission Test, Phase 2: Part 1 |
|
||
| 259 | The Away Mission Test, Phase 2: Part 2 |
|
||
| 260 | The Away Mission Test, Phase 2: Part 3 |
|
||
| 261 | The Away Mission Test, Phase 2: Part 4 |
|
||
| 262 | The Away Mission Test, Phase 2: Part 5 |
|
||
| 263 | The Away Mission Test, Phase 2: Part 6 |
|